Create Target DB
Database Migration
Database migrations can be performed in a number of ways. In this workshop we will perform a continuous data replication migration using AWS Database Migrations Service (DMS).
Before you configure AWS DMS, you will need to create your target database in the AWS account provided. We will create the database using AWS Relational Database Service (RDS) which will allow us to easily set up, operate, and scale a relational database in the cloud.
Create the subnet group for target database
The Database Subnet Group is used to notify the RDS Service of your networking, (subnet and Availability Zone), requirements for the new database.
-
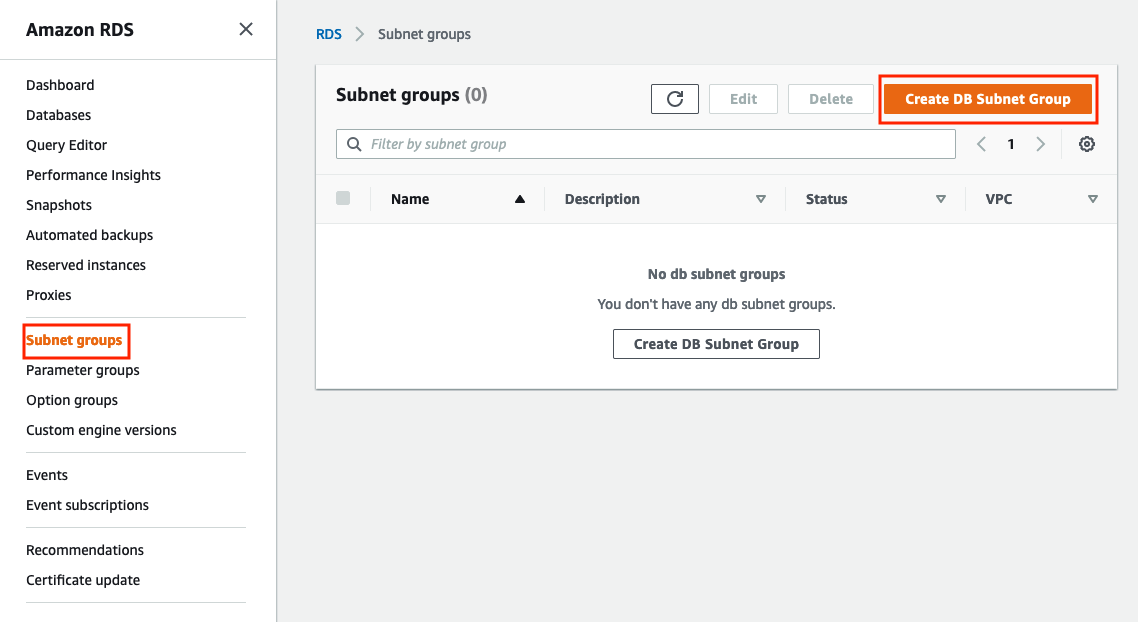
Go to the AWS Console, from Services choose RDS, select Subnet groups from the menu on the left and click Create DB Subnet Group
-
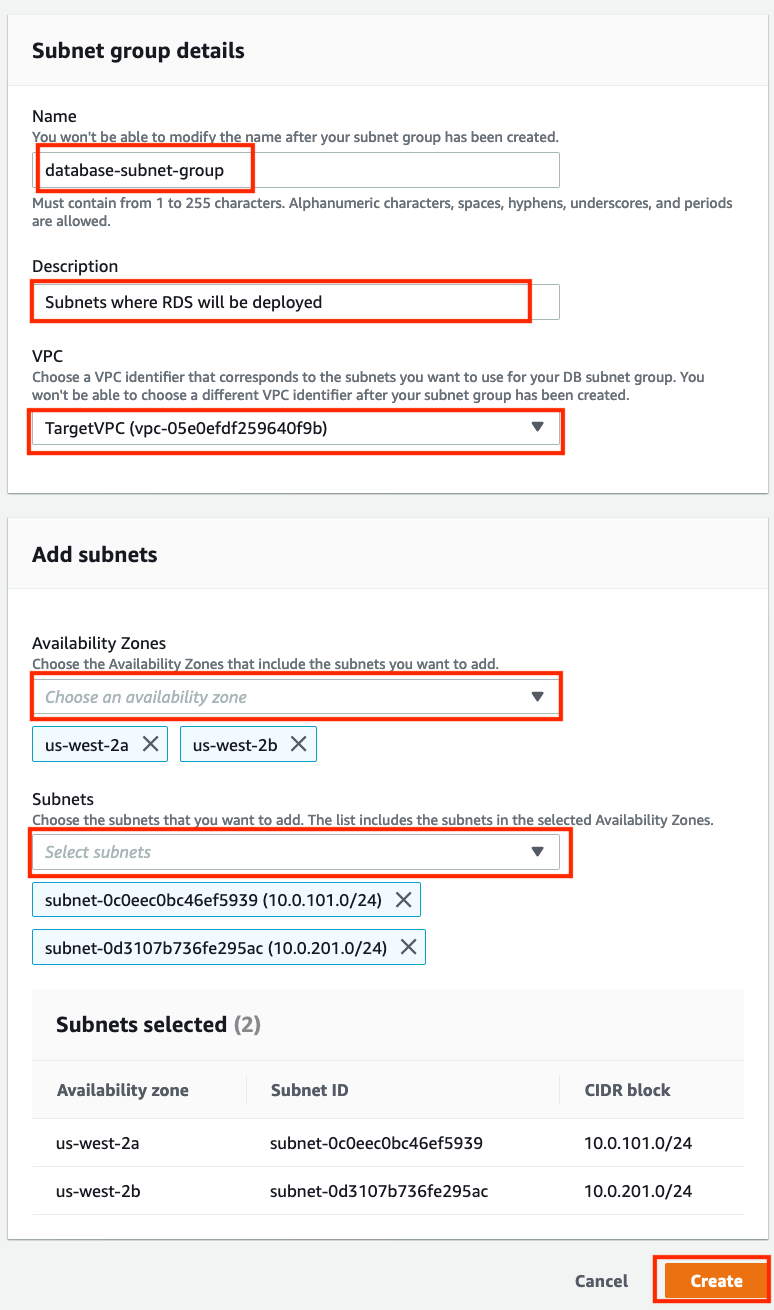
On the Create DB subnet group enter the following information:
a. Basic information
Parameter Value Name database-subnet-groupDescription Subnets where RDS will be deployedVPC Select the TargetVPC b. In the Add subnets panel first choose us-west-2a from the Availability Zone drop down list and then from the Subnets drop down list that appears, pick the subnet with an address range showing as 10.0.101.0/24. Go back to the Availablity Zone drop down list and choose us-west-2b and then choose the subnet with address range 10.0.201.0/24 from the subnets drop down.
c. If your final selections look like the following screen shot then go ahead and click Create.
Create the target database
You can now create the databases.
-
Still inside the RDS Service, you can now select Databases from the menu on the left and click Create database.

-
Leave the default Standard Create selected and for the Engine options, select MySQL and Version MySQL 5.7.22.

To double check this is the same version as the source database you could confirm the source MySQL version from the source database using SQL query - SELECT@@version;
In the Template section select “Free Tier”.

Choosing the “Free Tier” template limits your options in the next steps of the wizard, so that you stay within the limits of AWS Free Tier.
In the Settings section, configure the DB instance identifier (e.g.
database-1), Master username (e.g.admin).Choose a Master password for your new database e.g.
Password123, and enter it in both the Master password and the Confirm password boxes.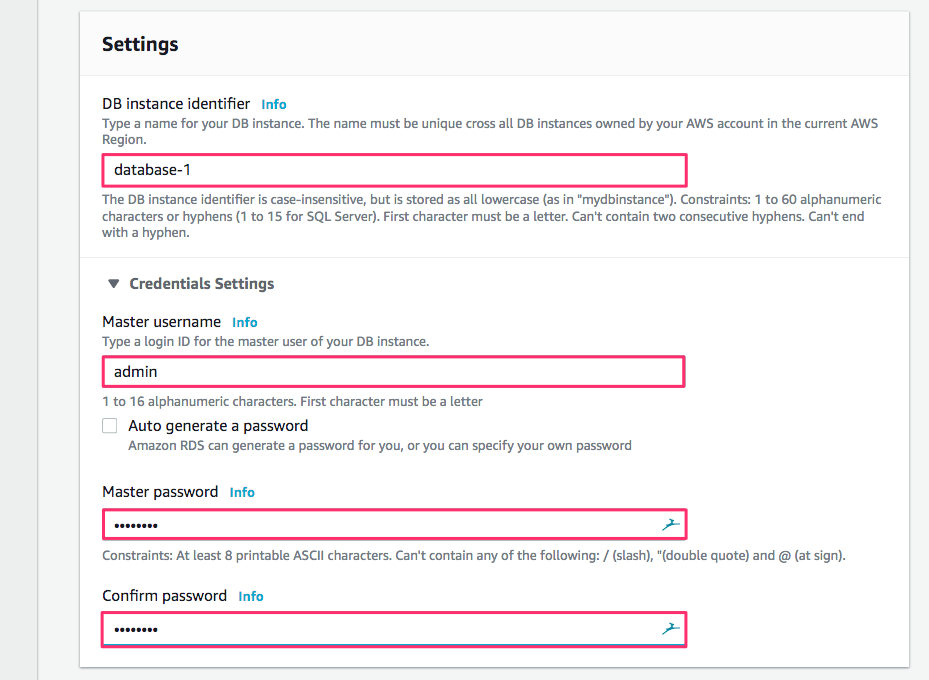
Make sure to write down Master username and Master password, as you will use them later.
Select db.t2.micro from the Burstable DB instance class, General Purpose (SSD) for Storage Type and uncheck Enable storage autoscaling as we do not need more than 20 GB of storage for this database.
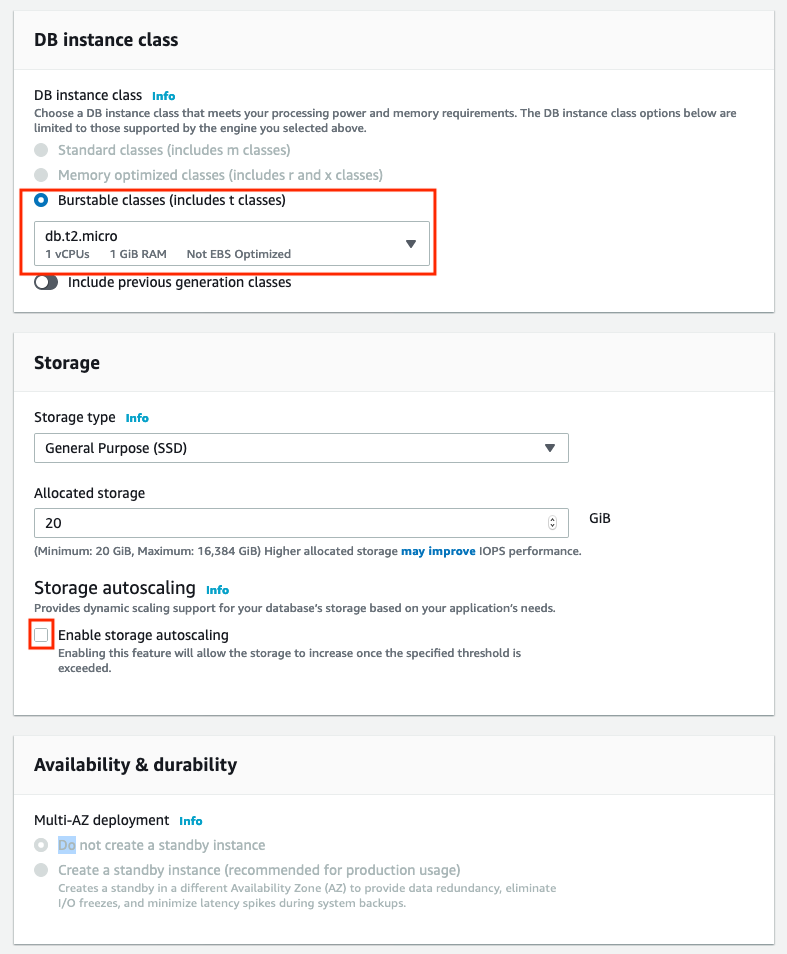
Note: If t2.micro is not available, unselect Free Tier and pick Dev/Test instead, then select t3.micro or another small database.
-
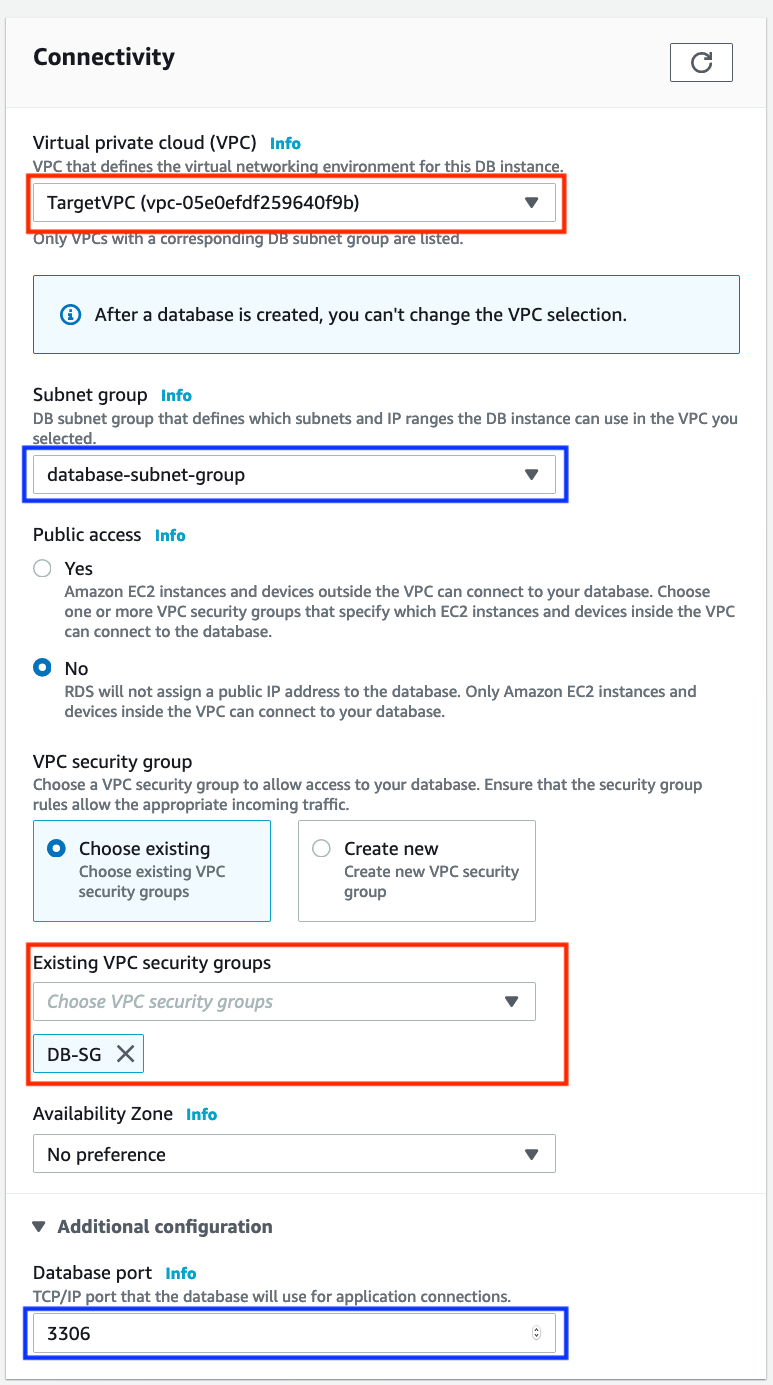
In the Connectivity section:
- In Virtual Private Cloud (VPC), select TargetVPC (this is the Amazon Virtual Private Cloud that was automatically created for this lab)
- Check that the DB Subnet group you have created earlier has been automatically selected.
- In Connectivity Additional configuration -> VPC Security Group
- Pick Choose existing VPC security group and then in the dropdown list, select DB-SG.
- Click on Additional Configuration in the Connectivity section to open the port selection and make sure it is set to 3306.
-
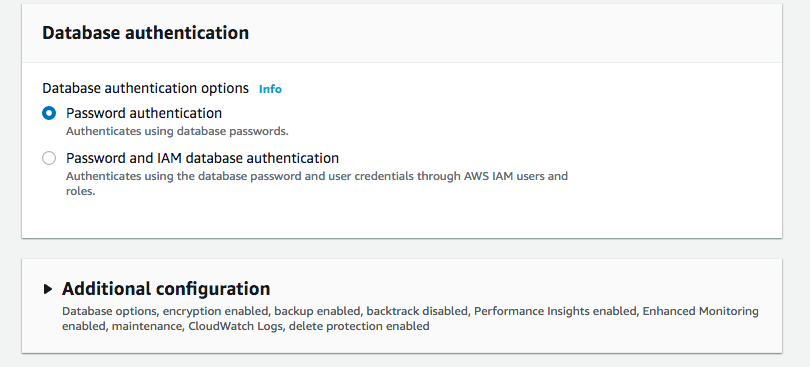
Under Database authentication, choose Password authentication.
-
In the Additional configuration, leave all settings at the default, making sure that Enable Enhanced monitoring under the Monitoring section is unchecked as indicated below:

Using Enhanced monitoring is a very good idea for production workloads. During labs and AWS hosted events we uncheck it because of limits on the permissions in the IAM Role that was provisioned for doing the lab.
-
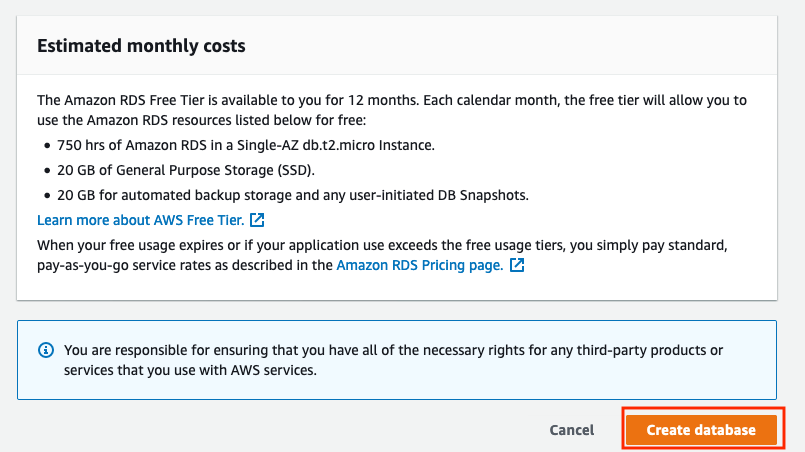
Review the Estimated monthly costs and click the Create database button.
-
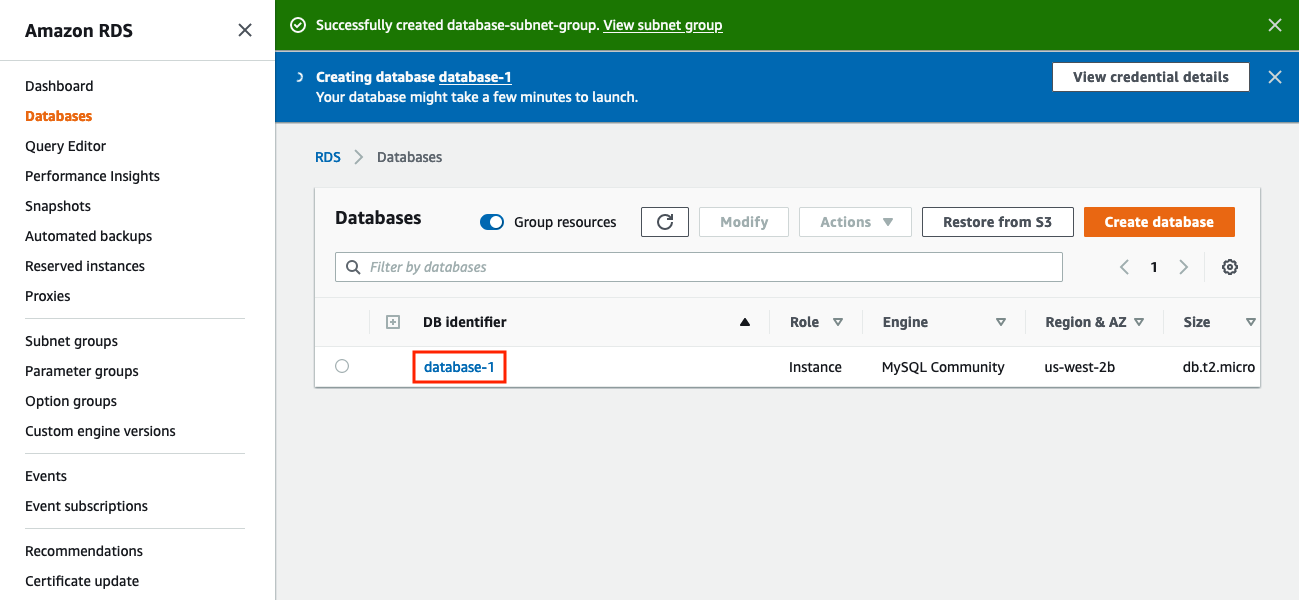
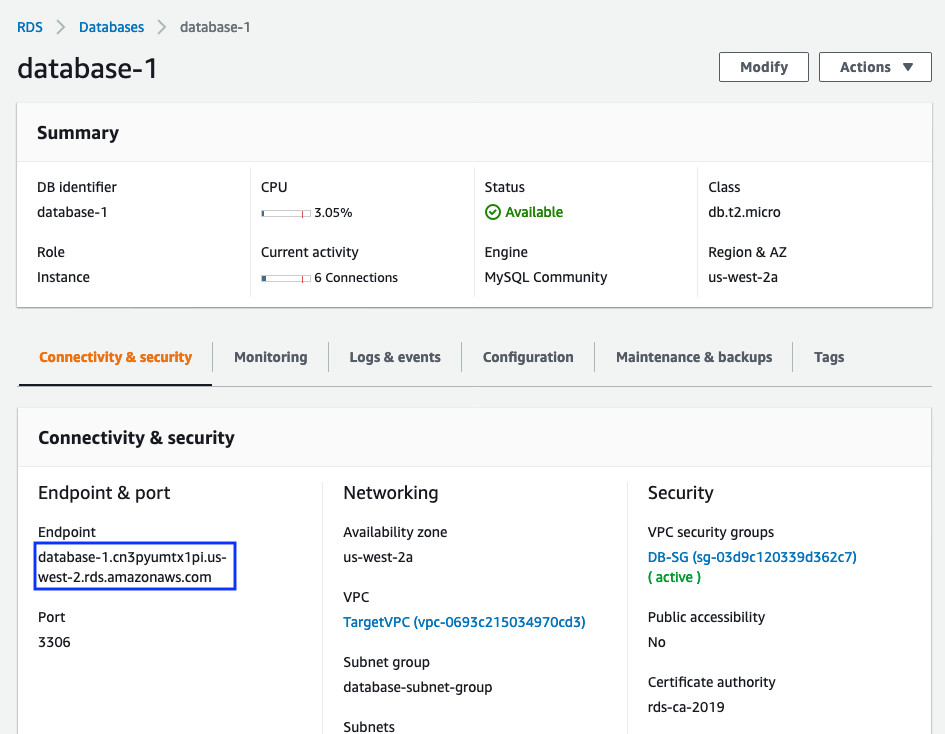
You don’t have to wait until the database finishes being created before you go on to the next step, but you will need the Endpoint information for the database. Click on the DB Identifier in the list of databases e.g. database-1.
-
The Endpoint may initially appear blank, refresh the page using the browser refresh every 30s or so until the endpoint shows up in the Connectivity & security tab. Copy and save the value (e.g. in Notepad) for use later in the very last section of the next lab, configuring the webserver. It can take 5-10 minutes in total for the database to be created including the automatic initial backup.
-
While the database create is finishing, you can go on to the next step.