Configure Application
When the Cutover is finished and Application Migration Service has created a running instance of the Webserver in your AWS account, it’s time to update the web application configuration to use your replicated AWS RDS database (created in the first lab Database Migration ).
Save Webserver address details for use later.
-
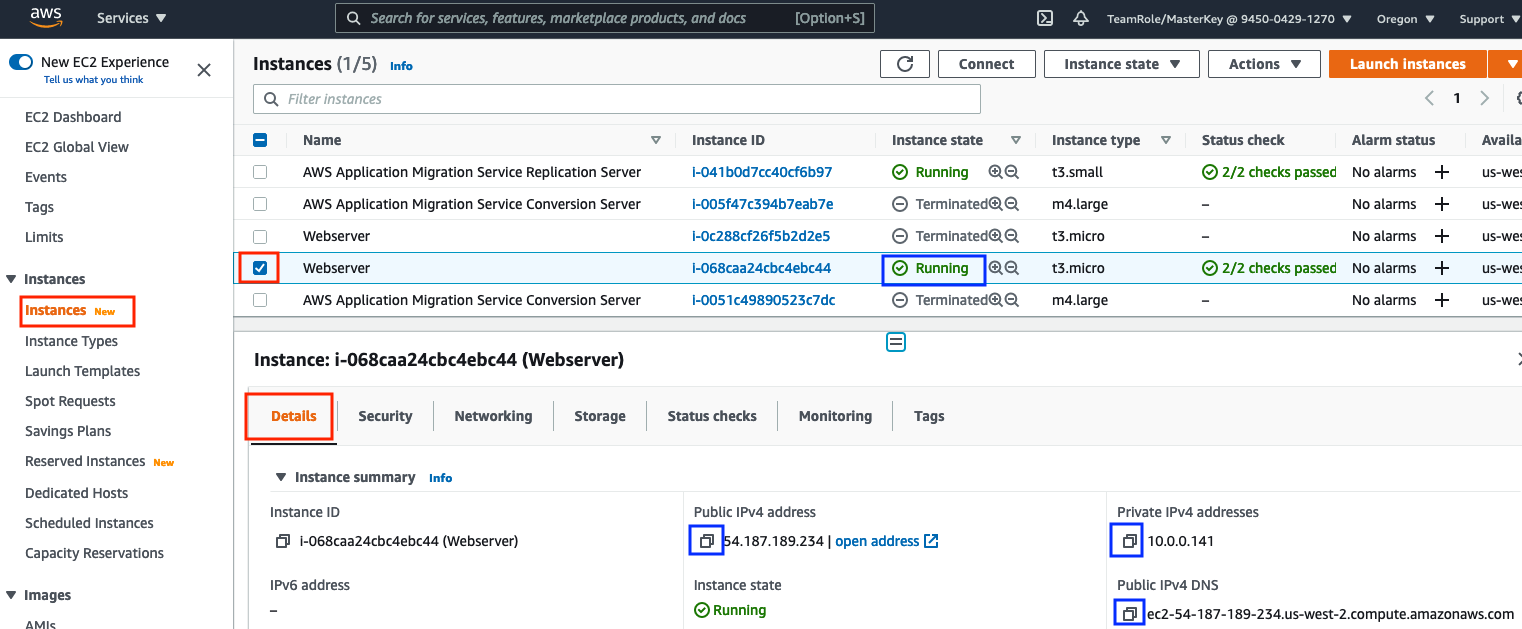
Go to AWS Console -> EC2, select Instances on the left hand menu and in the list check the box next to the Webserver. If more than one Webserver is listed, make sure you pick the Running server not the Terminated test server.
-
From the Details tab, copy and paste to a safe place (e.g. Notepad) its Public IPv4 address address and Private IPv4 addresses and Public IPv4 DNS . (Ignore any red AWS Computer Optimizer finding messages).
-
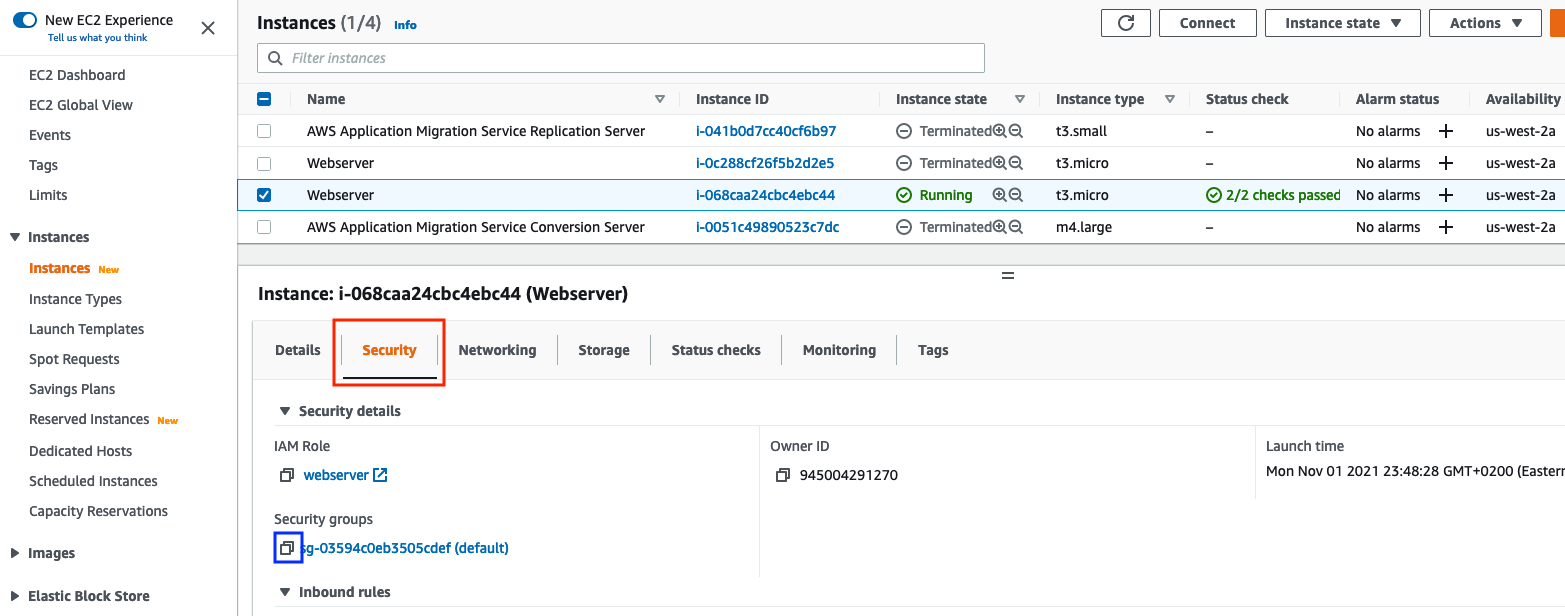
From the Security tab, copy and paste to a safe place (e.g. Notepad) the Webserver’s Security Group id.
Login to the Webserver created by the Application Migration Service.
Option A. Create a Systems Manager connection:
-
To use Systems Manager with your new Webserver instance, we need to give it an EC2 instance profile with a role that allows Systems Manager access.
a). Select the IAM service, select Roles from the left side menu and click on Create Role.
b) Select the IAM service and click Roles from the left hand menu.

c) Click Create role and choose EC2 as this is the service that will use this role. Then click Next: Permissions

d) In the Filter policies box enter
AmazonSSMManagedInstanceCore, tick the box next to the policy in the listing and then click Next: Tags.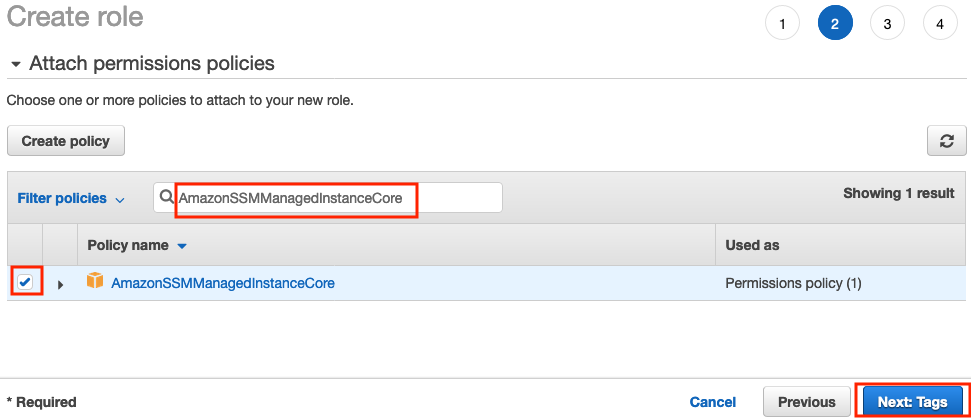
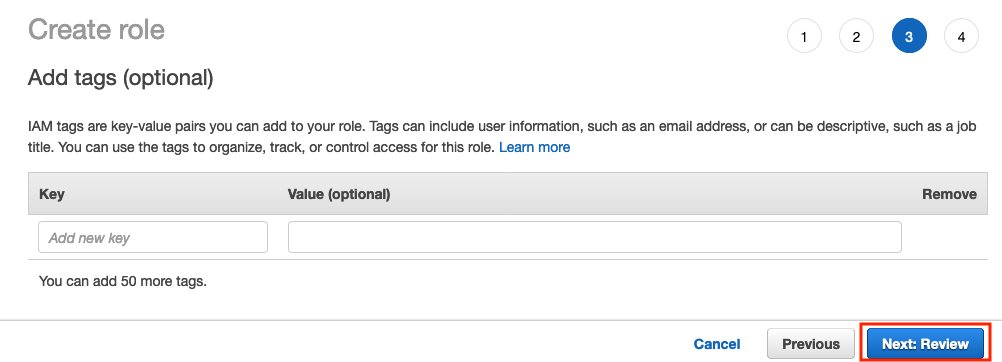
e) Click Next: Review.
f) Enter
webserveras the Role name. Finally, double check that AmazonSSMManagedInstanceCore, is listed as a policy for the role and then click Create role.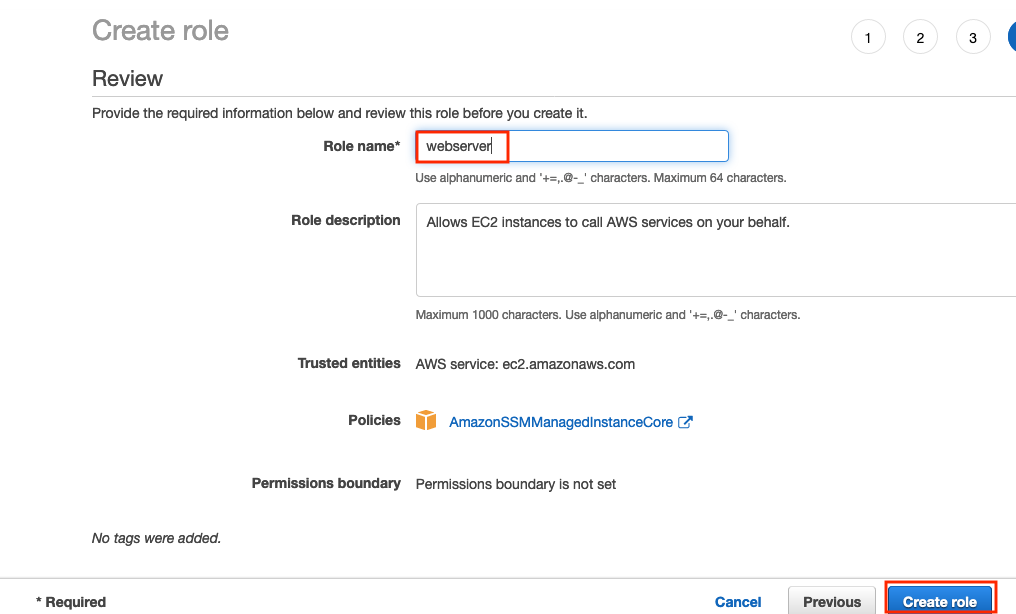
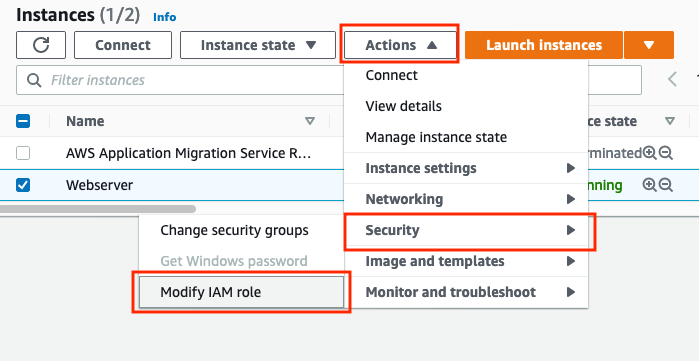
g) Now you need to set the webserver instance to use this new webserver role. Go to the EC2 service and the Instances list and check the webserver instance. Make sure it is the running webserver, not the terminated one. Then click Actions, select Security and then Modify Role from the drop down.
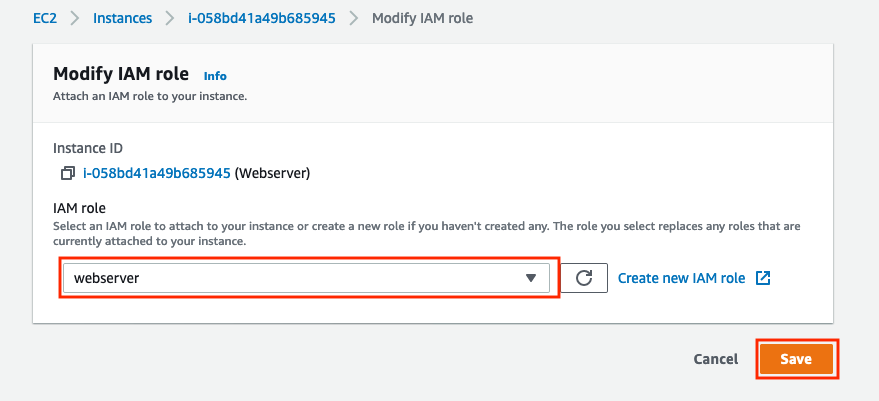
h) In the Modify IAM Role dialog, select webserver as the role from the drop down list and then click Save.
-
Stay in Oregon (us-west-2) region as this is where you migrated application is going to run. Go to AWS Console > Services > Systems Manager > Node Management > Session Manager, click the Start Session button.
-
Select the Webserver instance and click the Start Session button.
It can take a few minutes for the change to webserver role to be recognized by Systems Manager, you may have to refresh several times before the webserver instance shows up in the Systems Manager list. You can speed this up by re-booting the server using the Actions drop down on the EC2 instance list after selecting the webserver.
-
A logged-in session window on the Webserver running a Unix command line will automatically open where you can configure the web server.
-
Run these two commands to ensure you run as the expected user.
sudo su ubuntu
cd
``
Option B. Create a ssh/putty connection
-
Use the same ssh username, ubuntu, and SSH Key as you did for the source webserver i.e. the Webserver Username and Webserver SSH Key on the Team Dashboard
If you’re not sure how to use SSH to access servers, check the following:
- For Microsoft Windows users view this article.
- For Mac OS users view this article.
End of Options
Configuring the Webserver
The webserver is an exact copy of the original source web server, so it is still pointing to the source database and the website refers to the IP address of the source web server. In this section we update these values on the webserver.
- Copy the following commands to a text editor e.g. Notepad and change the values in angle brackets to the values you saved earlier. Then copy the modifed EXPORT commands and paste them on to the webserver command line session.
export DB_USER='<Username from Database Migration setup>'
export DB_HOST='<Endpoint of the created RDS instance>'
export DB_PASSWORD='<Password from Database Migration setup>'
export WP_HOME='<Target Webserver Public DNS (IPv4)>'
- Run this command to update the WordPress config file /var/www/html/wp-config.php with the settings from the environment variables.
sudo sed -i \
-e "s/.*DB_USER.*/define('DB_USER', '$DB_USER');/" \
-e "s/.*DB_HOST.*/define('DB_HOST', '$DB_HOST');/" \
-e "s/.*DB_PASSWORD.*/define('DB_PASSWORD', '$DB_PASSWORD');/" \
-e "s/.*WP_HOME.*/define('WP_HOME', '$WP_HOME');/" \
-e "/.*DB_USER.*/adefine('WP_HOME', '$WP_HOME');" \
/var/www/html/wp-config.php
Alternatively you could edit the file, /var/www/html/wp-config.php directly by hand. If you do this you need to amend and/or insert “define” statements to make sure DB_USER, DB_HOST, DB_PASSWORD, WP_HOME have the correct values e.g. define(‘WP_HOME’, ‘ec2-34-210-69-129.us-west-2.compute.amazonaws.com’);
- Terminate the Systems Manager session or close the ssh connection.
Update the Web Server Security Group
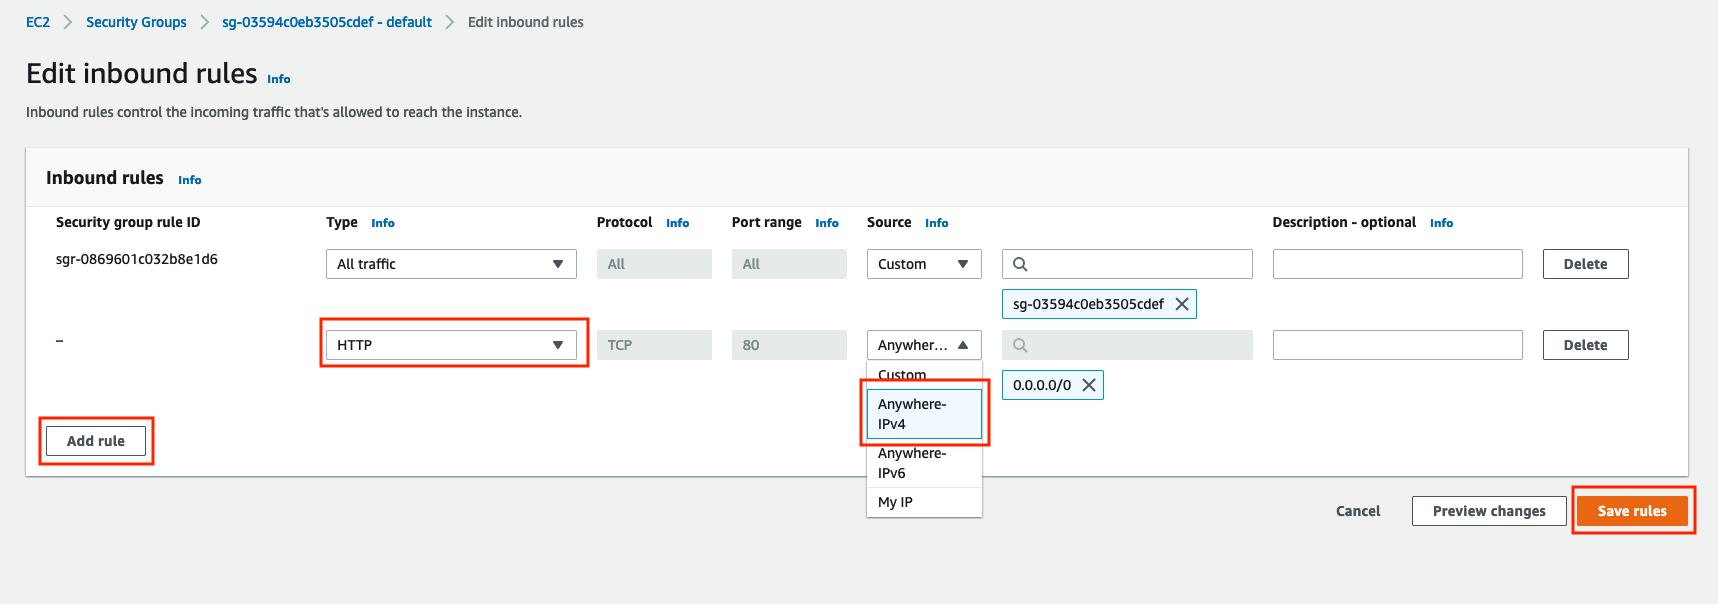
We need to update the Web Server’s VPC security group to allow inbound web http traffic on port 80 from anywhere, (or at least from you).
-
Go to AWS Console > Services > EC2 > Security Groups and select your webserver security group using the Security Group ID saved earlier.
-
Go to the Inbound tab and click the Edit Inbound Rules button
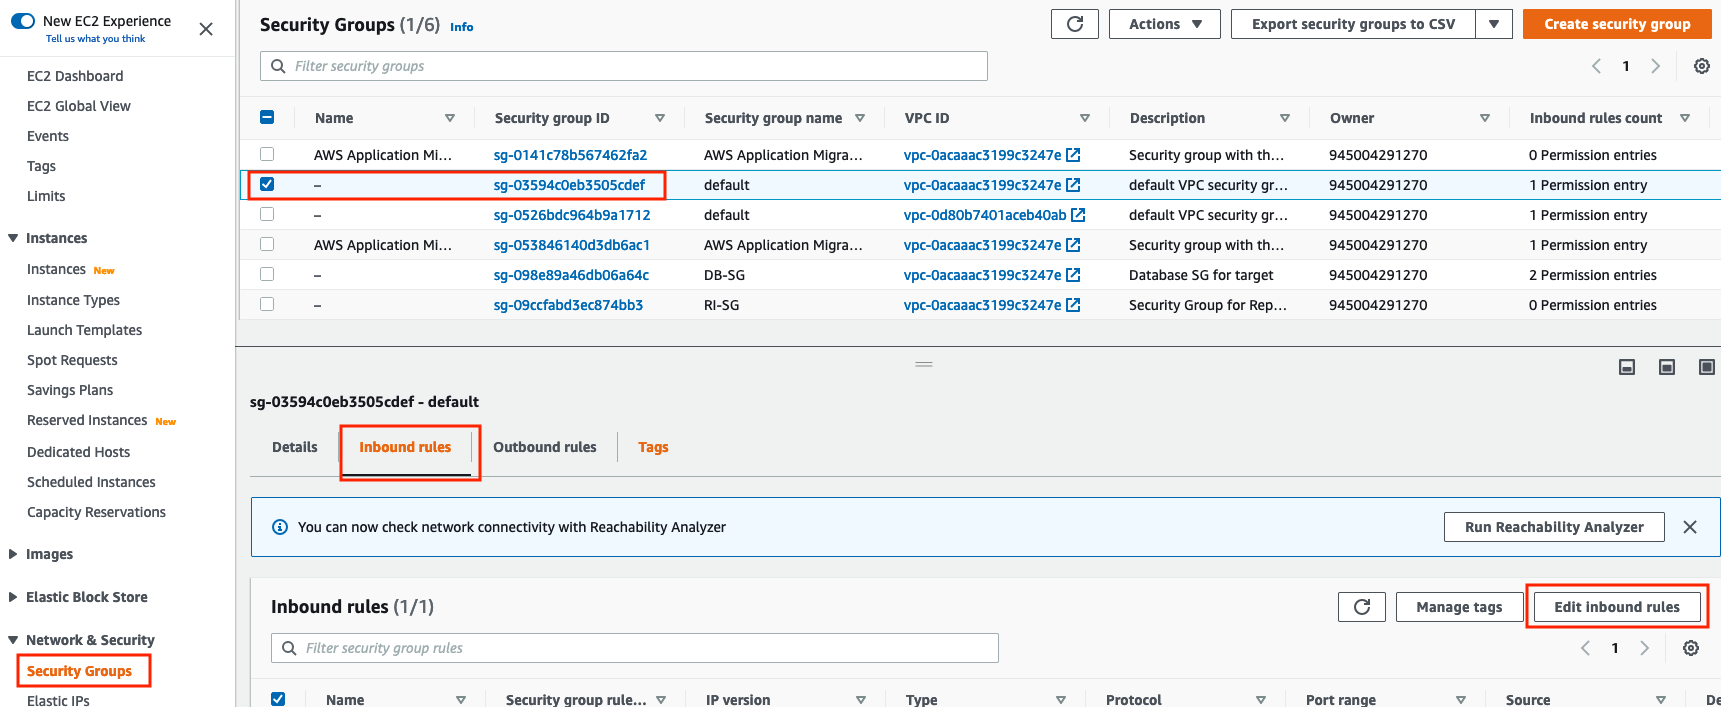
- Add an inbound rule that allows traffic on port 80 (http port) from the Anywhere-IPv4 source, and click Save rules
Update the Database Security Group
We need to update the RDS instance VPC security group to allow inbound traffic from the new Webserver.
-
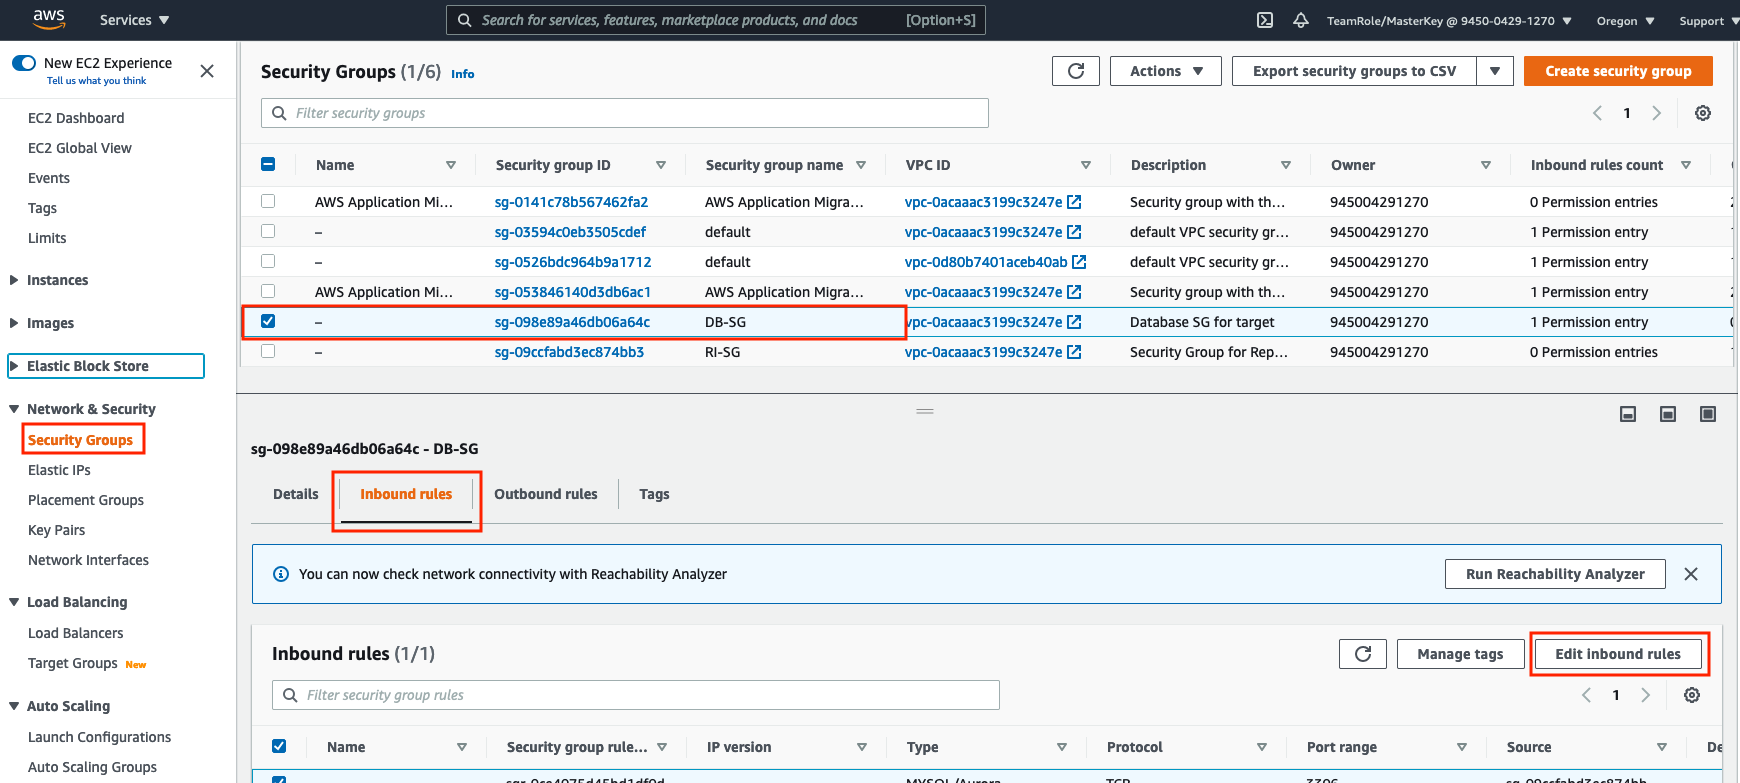
Go to AWS Console > Services > EC2 > Security Groups and select your RDS VPC security group (DB-SG)
-
Go to the Inbound tab and click the Edit Inbound Rules button
-
Add an inbound rule that allows traffic from the Webserver (using its security group name which you saved earlier) on port 3306 (MySQL port)
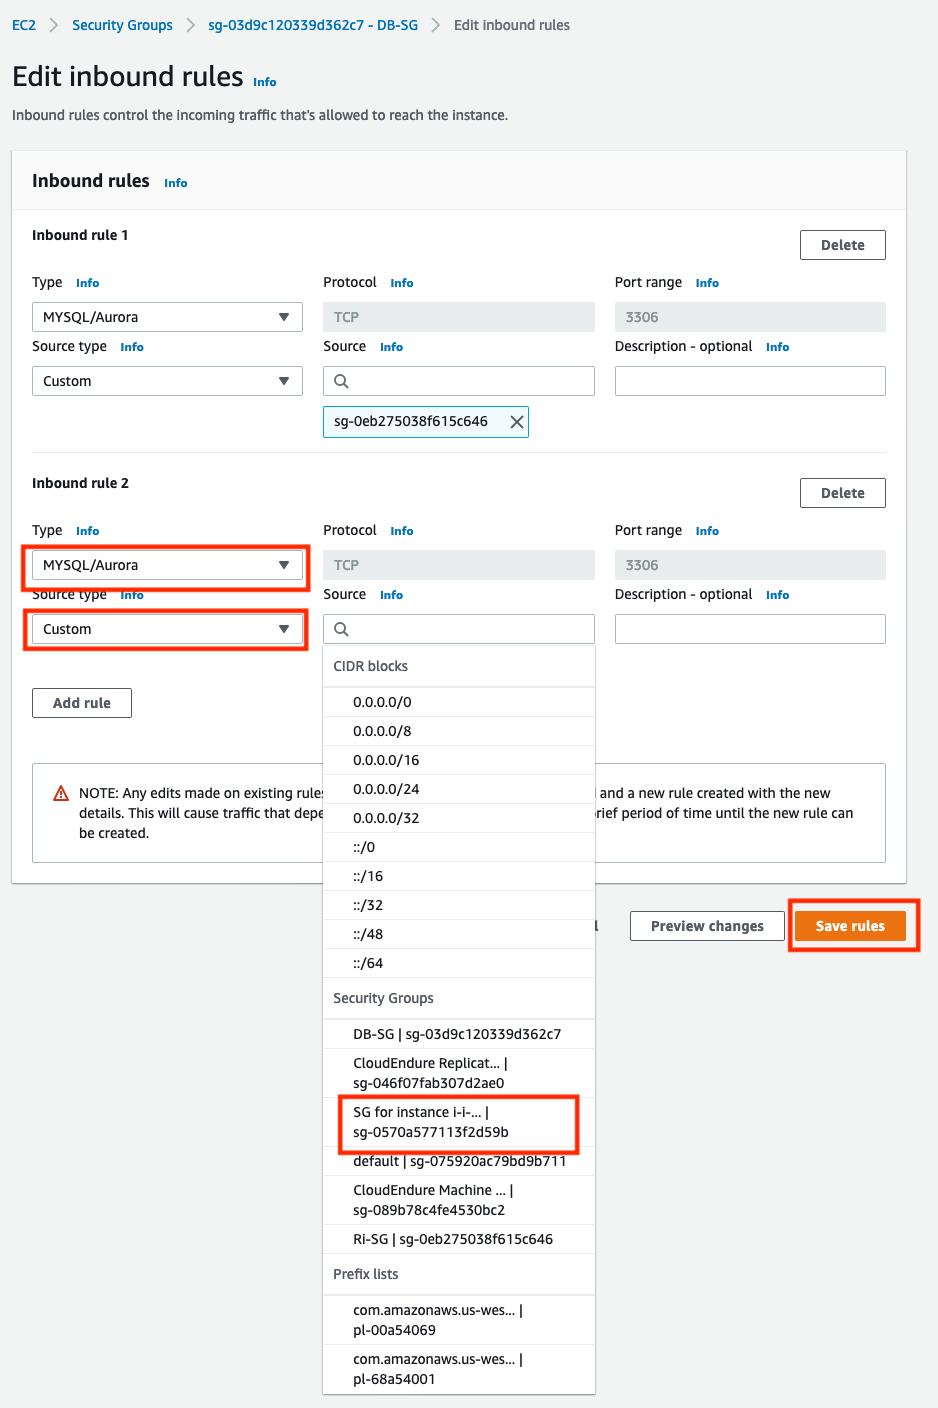
If you used a different security group name for your RDS instance, you can find it in details of your RDS instance, Connectivity & security, Security section.
Find a Unicorn
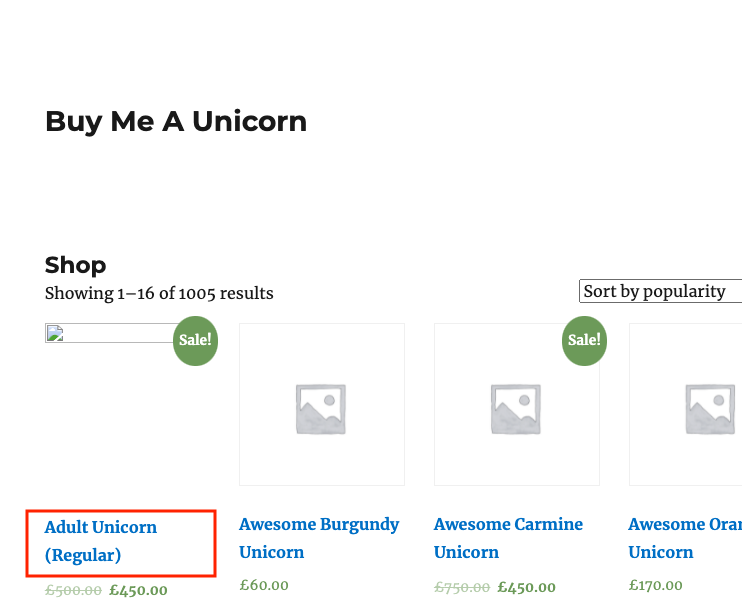
Open the Webserver Public DNS (IPv4) name in your web browser, (make sure you use an http connection, not https). You should see a unicorn store, with some missing images where unicorns have hidden themselves. Click on Adult Unicorn to try and find one of the unicorns.
Troubleshooting
- Make sure that RDS database related information configured on the Webserver in /var/www/html/wp-config.php is correct
- Make sure that the RDS database is using the DB-SG security group
- Make sure that the Webserver EC2 Launch Template points at a TargetVPC public-subnet-a