Install agent
AWS Application Migration Service replicates data to AWS using agent that must be installed on the source server.
Install Agent on the Webserver
To install the CloudEndure agent on the source webserver connect to the Source Environment Webserver server using either Option A. Systems Manager (easiest) or Option B ssh/putty.
Option A. Create a Systems Manager connection:
- In the Management Console switch to the US East (N. Virginia) region where the source database server has already been registered with Systems Manager under the name gameday-web

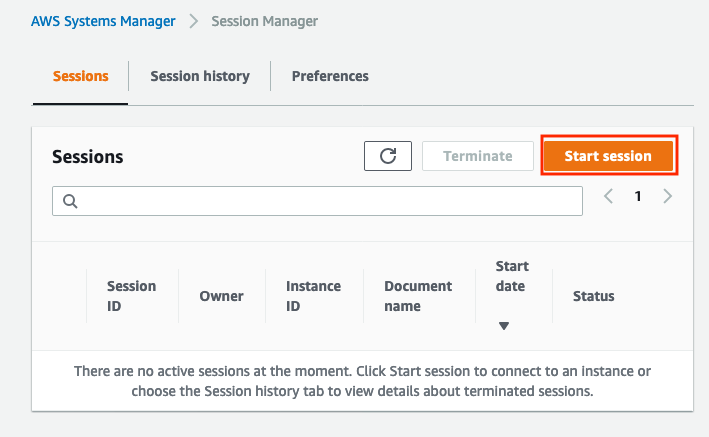
- Go to AWS Console > Services > Systems Manager > Node Management > Session Manager and click the Start Session button.

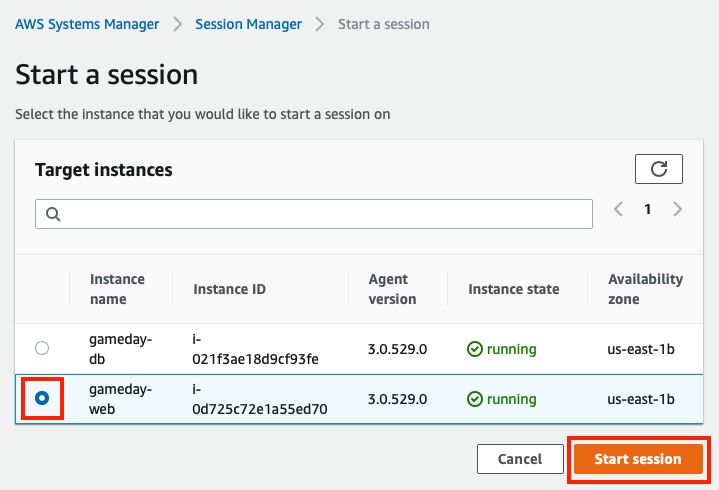
- Select the gameday-web instance and click the Start Session button.

- A logged-in session window on the source web server running a Unix command line will automatically open where you can install the MGN agent.

-
Before installing the agent, run these two commands to ensure it is installed in a user directory
sudo su ubuntu
cd
``
More information on connecting to on-premise servers with Systems Manager can be found in the Systems Manager documentation.
Option B. Create a ssh/putty connection
- You can find ssh information needed to access the webserver, Webserver IP, Webserver Username and Webserver SSH Key on the Team Dashboard.

-
Mac OS users and Windows 10 users with command line ssh enabled can follow the command line ssh client instructons in this article.
-
All other Windows users can use the “putty” tool by following instructions in this article.
End of Options
Install Agent on Webserver
-
Retrieve AWS credentials for the agent
For the Application Migration Service agent to replicate data, you need to have an AWS IAM User with proper privileges created in your target AWS account (see more information here). We’ve created a user for you, what you need to do is retrieve its Access Key ID and Secret Access Key to use it during agent installatin.
These Application Migration Service - IAM Access Key ID and IAM Secret Access Key can be found on the Team Dashboard. Copy them and keep them somewhere ready for use later e.g. in Notepad.

DOUBLE CHECK that you have picked the access key and secret access key under “AWS Application Migration Service” on the dashboard, NOT the ones listed under Cloud Endure Migration.
-
Run the following commands on the weberver
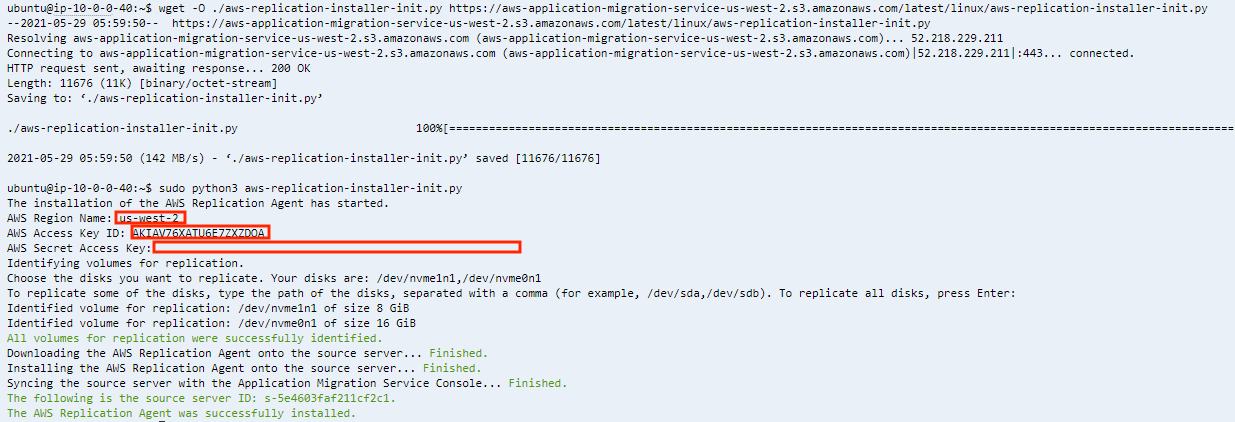
wget -O ./aws-replication-installer-init.py https://aws-application-migration-service-us-west-2.s3.amazonaws.com/latest/linux/aws-replication-installer-init.py
sudo python3 aws-replication-installer-init.py
-
Provide AWS region and AWS credentials
When prompted provide AWS Region
us-west-2, then AWS Access Key ID and AWS Secret Access Key retrieved in step 1.When copying-pasting AWS Secret Access Key, its content is not displayed for security reasons. Just press Enter after paste.
-
Confirm volumes to be replicated
After you’ve entered AWS credentials, installer will identify volumes attached to the system and prompt you to choose which disks you want to replicate. Press Enter since we want to replicate all volumes.

It may take a minute or two for the installation to complete.
-
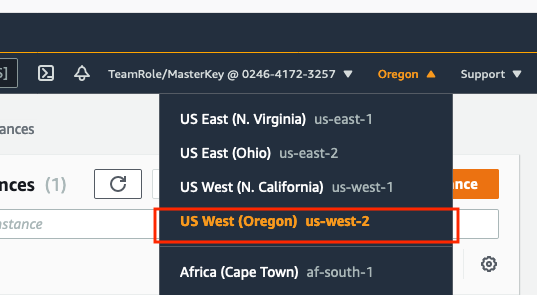
Once you see the message “The AWS Replication Agent was successfully installed”, you can Terminate your System Manager session and switch back to the us-west-2 region, or close your ssh session.

-
Replication starts automatically. Return to the AWS Application Migration Service console to see information about your server in the console Application Migration Service > Source Servers list.

The replication starts right away. While it’s taking place, let’s review and update server details.