Create Source and Target Endpoints
Pick up Database Server IP from Dashboard
-
For the next step you need to know the IP address of the source database server. This can be accessed from your individual Team Dashboard of Event Engine, the tab for which should still be open in your browser. (You can get back to it if necesssary via https://dashboard.eventengine.run/dashboard).
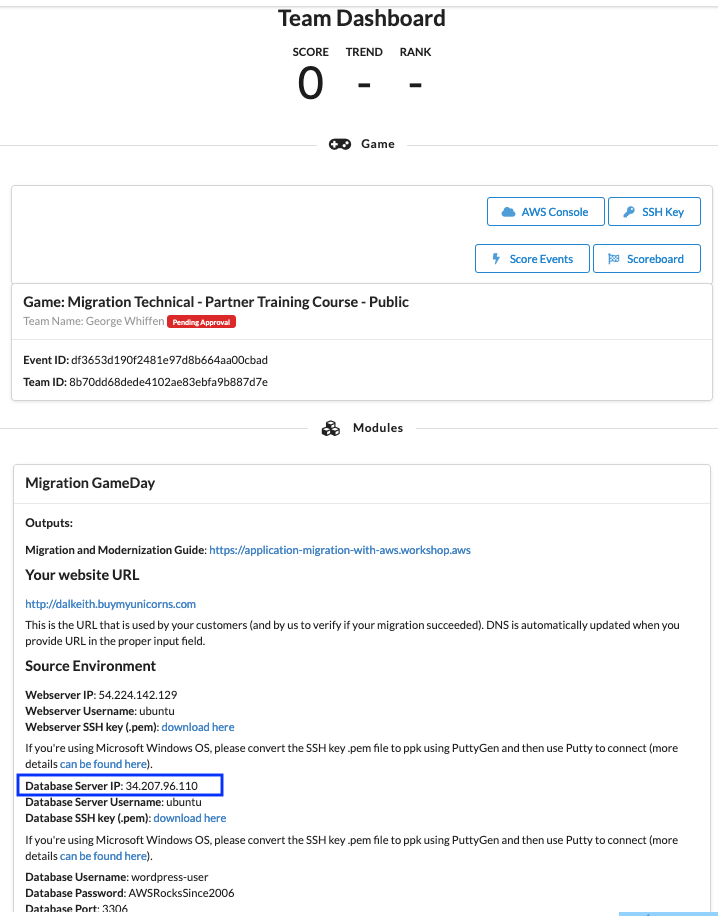
Create source and target endpoints
-
Go back to AWS Console with the Oregon region set, on the AWS Database Migration Service screen, click on Endpoints and Create endpoint button.

-
Create the source endpoint
a. Use the following parameters to configure the endpoint:
Parameter Value Endpoint type Source endpoint Endpoint identifier source-endpointSource engine MySQL Access to endpoint database Check “Provide access information manually” radio button Server name Source Environment - use Database Server IP from the Event Engine - Team Dashboard Port 3306 SSL mode none User name wordpress-userPassword AWSRocksSince2006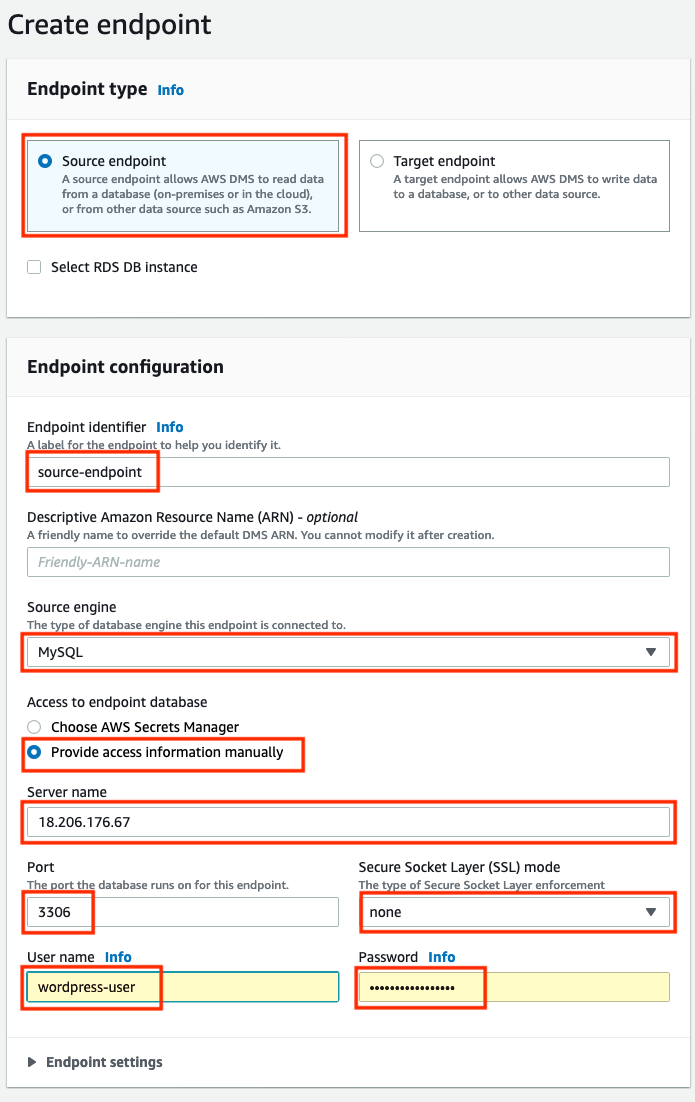
b. Click on Provide access information manually to enter the Server Name, Port, Username, Password details (
wordpress-user,AWSRocksSince2006).c. Open Test endpoint connection (optional) section, then in the VPC drop-down select TargetVPC and click the Run test button to verify that your endpoint configuration is valid.
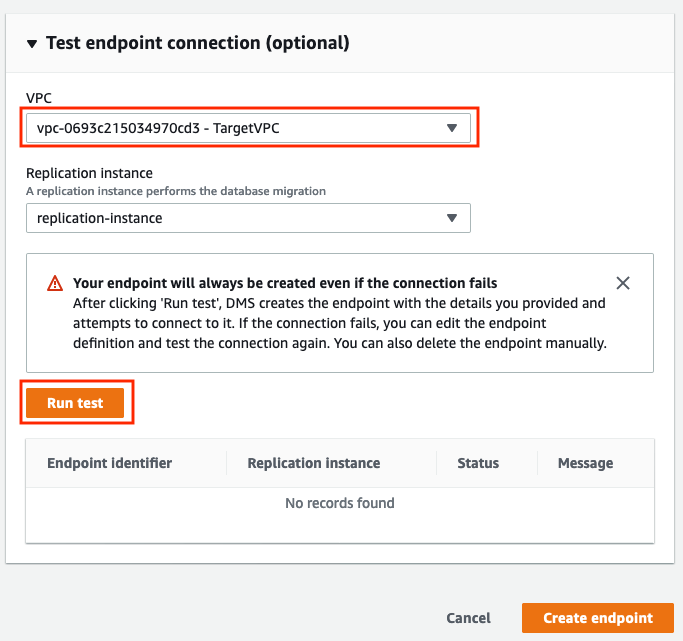
d. Test will run for a minute and you should see a successful message in the Status column.
In case of any errors - make sure you’ve configured the endpoint parameters correctly and that the Replication Instance was created with Publicly Accessible parameter checked.
-
To create the target endpoint, click again on Endpoints in the left menu and then the Create endpoint button.
a. Repeat the previous steps for the source endpoint for the target endpoint with the following new parameter values:
Parameter Value Endpoint type Target endpoint Select RDS DB instance checked RDS Instance Select your RDS instance from the drop-down (if it’s not visible enter values manually) Endpoint Identifier Default - database-1 Target Engine MySQL (will be pre-populated) Access to endpoint database Check “Provide access information manually” radio button Server Name DNS name of your RDS database (leave the the pre-populated value or, if nothing shows, cancel the endpoint creation and retry) Port 3306 (will be pre-populated) SSL mode none User name Leave the pre-populated value for Master username e.g. “admin” Password Enter the Master password you used when you created the RDS database e.g. “Password123” 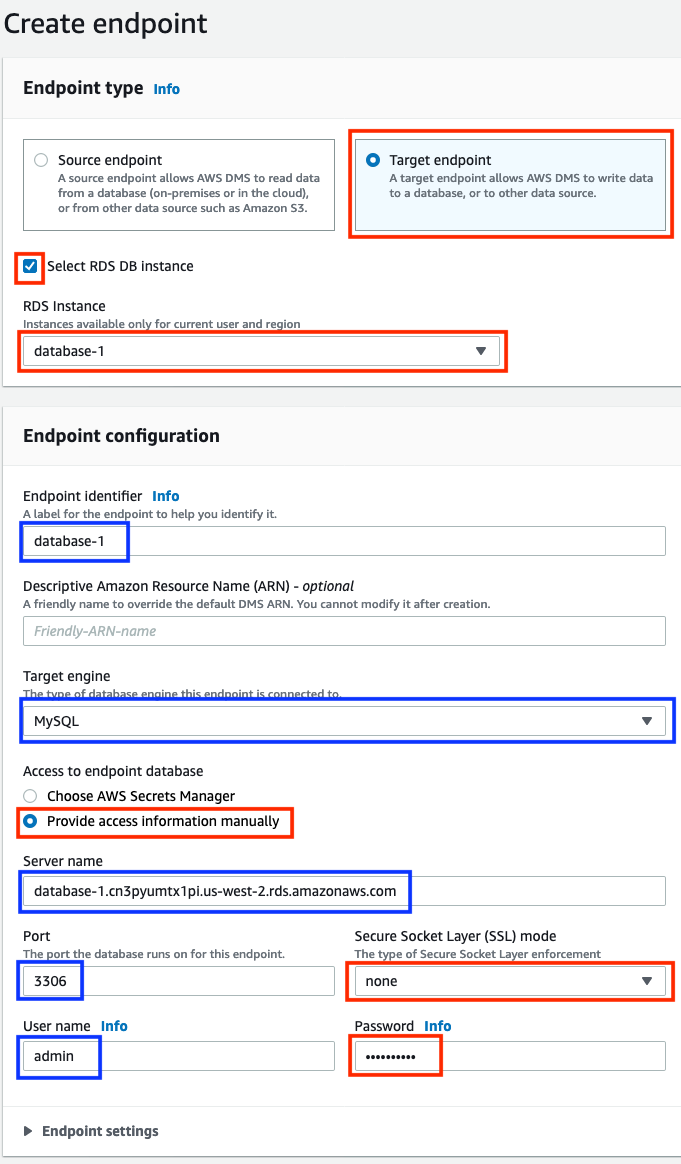
b. Open the Endpoint settings section, check the Use endpoint connection attributes and copy-paste into the Extra connection attributes box the following connection parameters:
parallelLoadThreads=1; initstmt=SET FOREIGN_KEY_CHECKS=0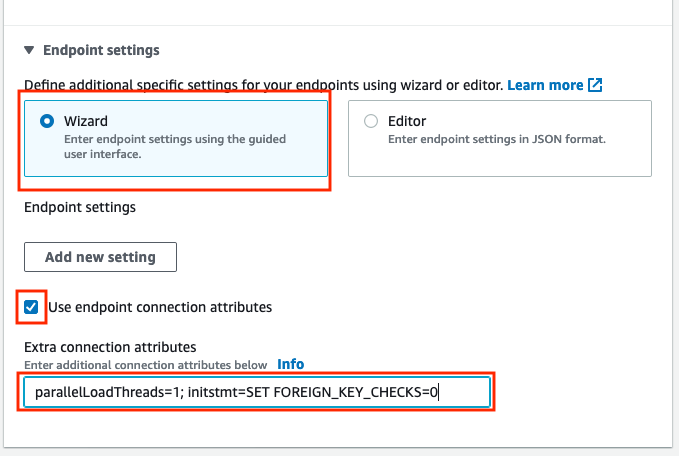
c. Under Test endpoint connection (optional) select TargetVPC in the VPC drop down and click the Run test button to verify that your endpoint is valid.

d. Test should complete in a minute or two and then you should see successful message in the Status column.
In case of any errors, make sure that the VPC security group of your RDS database allows for inbound traffic on port 3306 from the AWS DMS Replication Instance security group (or, alternatively, from the whole TargetVPC - 10.0.0.0/16).